Why Line a Swimsuit?
Lining a swimsuit is crucial for comfort, coverage, and durability. A proper swimsuit lining ensures the fabric isn’t see-through when wet and feels soft against the skin. It adds modesty by providing an extra layer, helps the suit hold its shape, and can even offer support in key areas like the bust or tummy. In short, a lining upgrades a handmade swimsuit’s quality – increasing coverage, structure, and longevity. Many experienced swimwear makers also find that fully lined suits tend to last longer (especially in chlorinated water) because the extra layer protects and reinforces the outer fabric. Overall, learning how to line a swimsuit will give your project a professional finish and ensure your swimsuit is both comfortable and long-lasting.
Types of Swimsuit Lining Fabrics
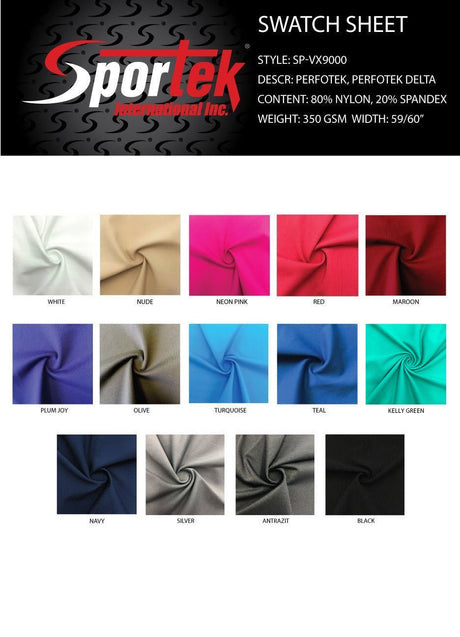
Not all linings are created equal. The three most popular swimsuit lining options are tricot swimwear lining, power mesh, and lightweight stretch mesh. Each has different properties and ideal uses. Let’s explore these lining fabrics and when to use each (all of these are available at SpandexByYard in various colors):
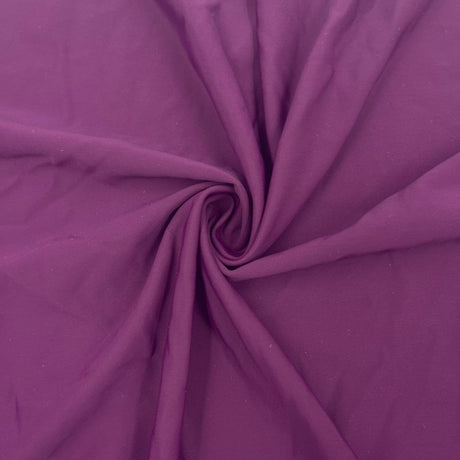
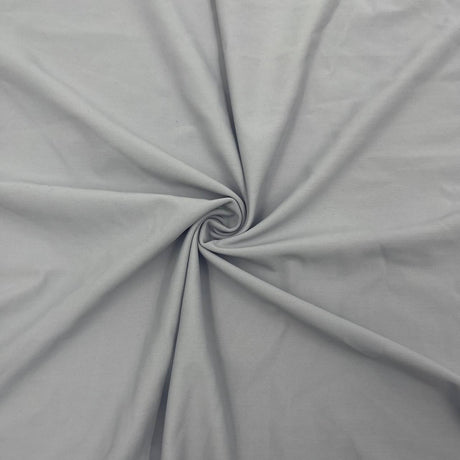
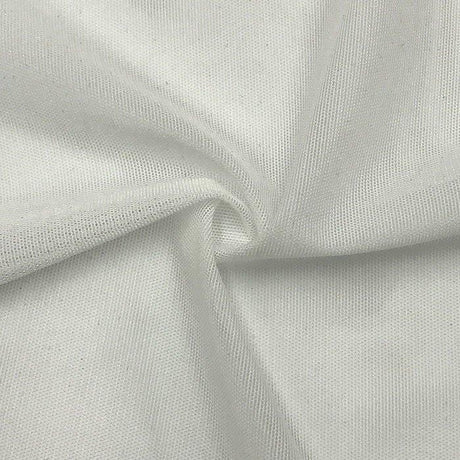
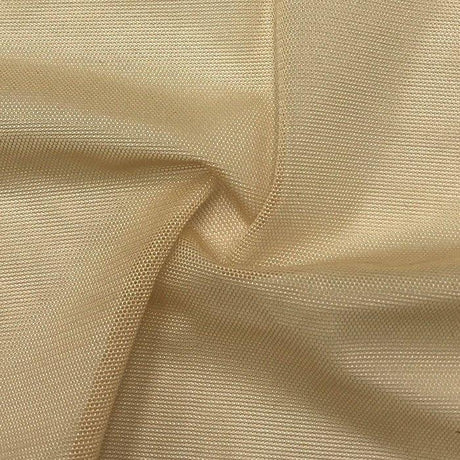
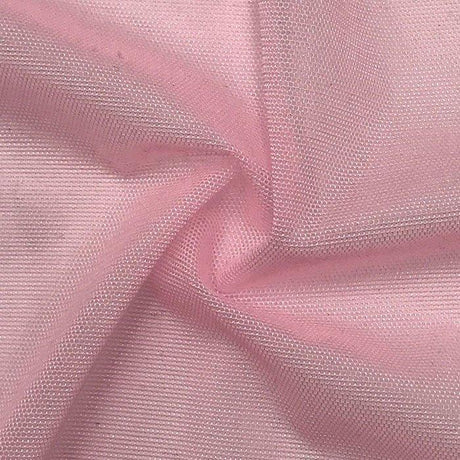
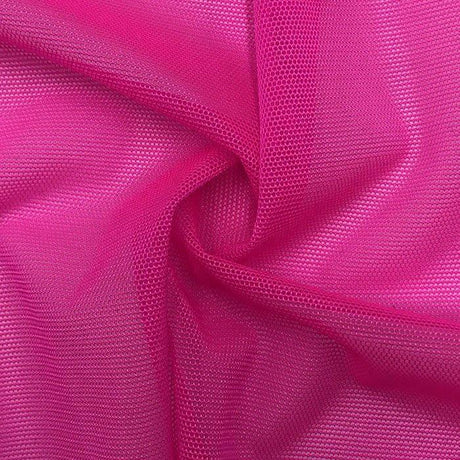
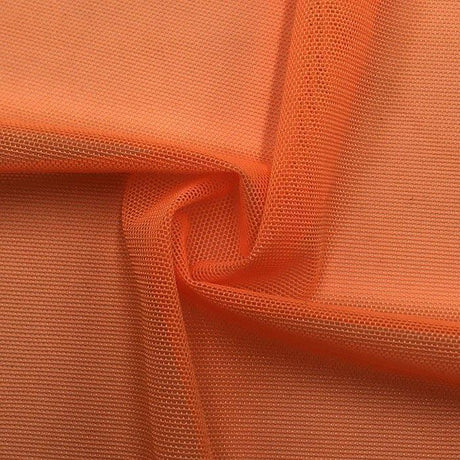
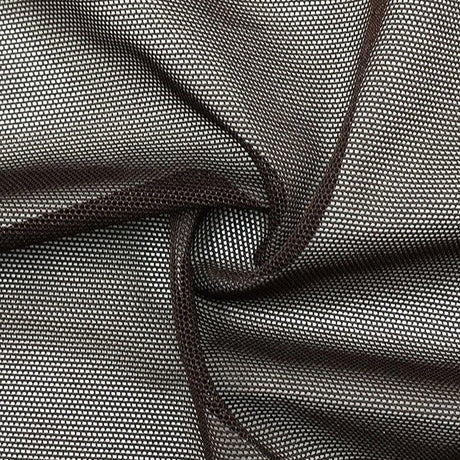
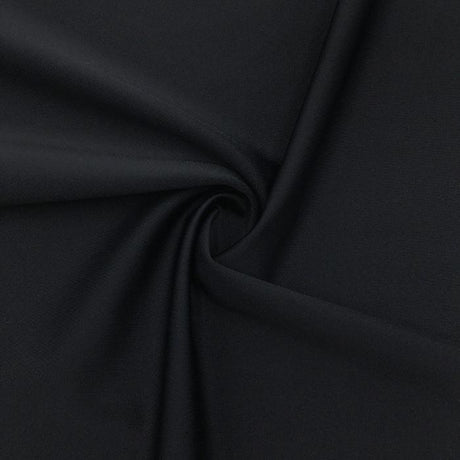
- Tricot Swimwear Lining (Nylon/Spandex Tricot): This is the standard swimsuit lining fabric used in many ready-to-wear suits. It’s a thin, smooth knit (often 80–100% nylon with 10–20% spandex) with 4-way stretch. Tricot lining is lightweight (around 90–120 GSM), dries quickly, and comes in neutral colors (beige, white, black) as well as fashion colors to match or contrast your outer fabric. Use tricot lining for general swimwear projects where you want a soft, breathable layer that doesn’t add bulk. For example, SpandexByYard’s HP-24 swimwear lining (100% polyester tricot, 98 GSM) is designed to be soft, comfortable, and to gently enhance curves under a swimsuit. This type of lining is perfect for overall modesty and comfort in one-piece suits, bikini bottoms, and bikini tops. If your main fabric is a dark or thick spandex, a single layer of tricot lining is usually sufficient for coverage.
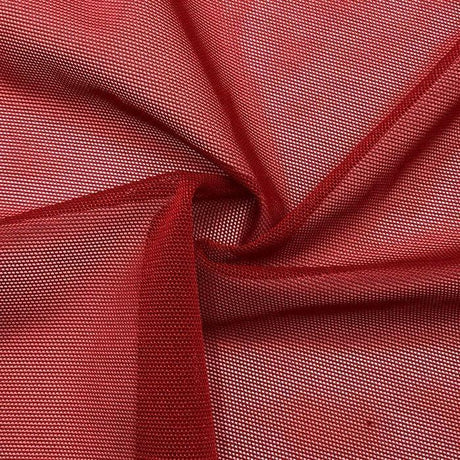
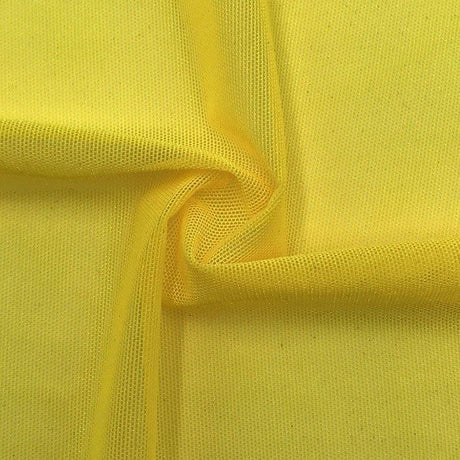
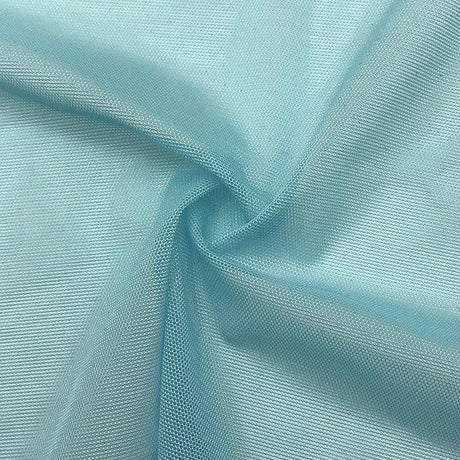
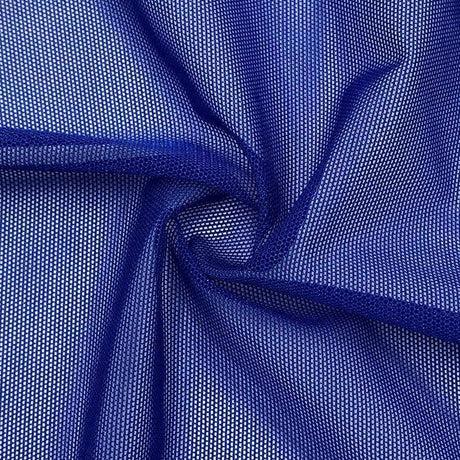
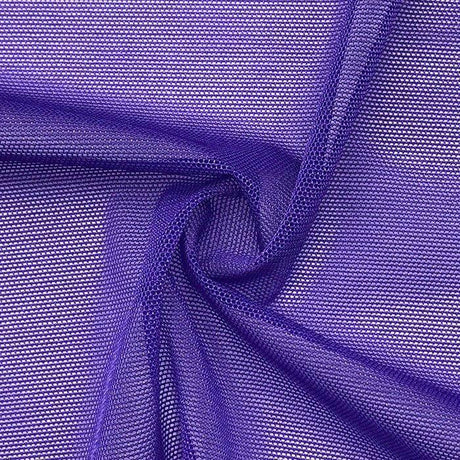
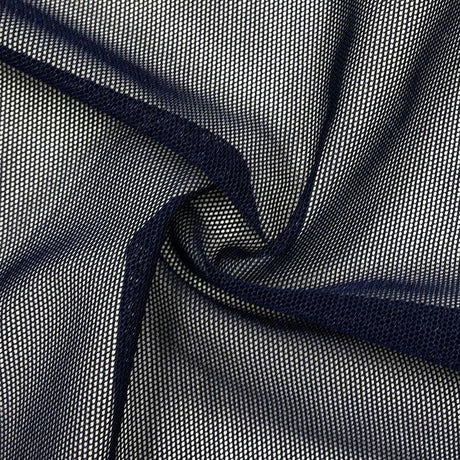
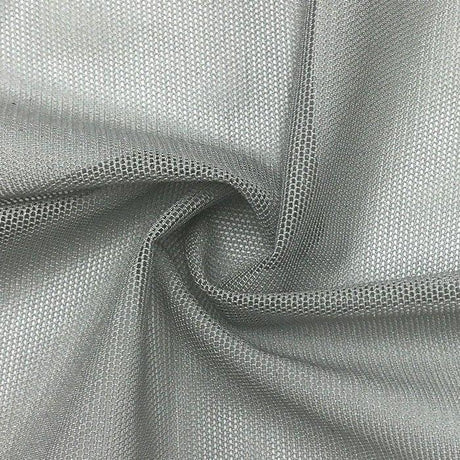
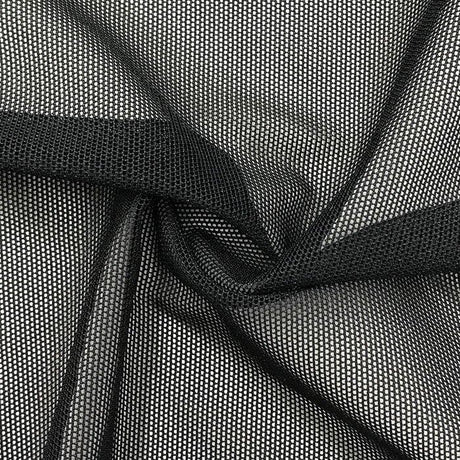
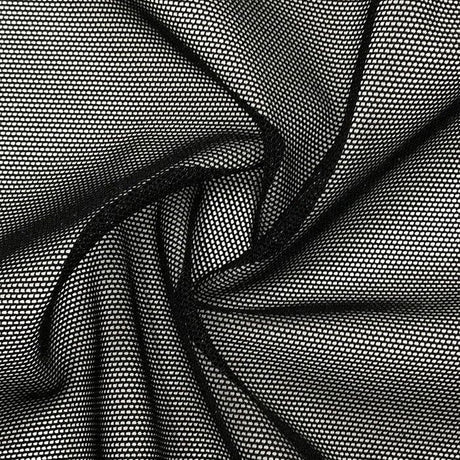
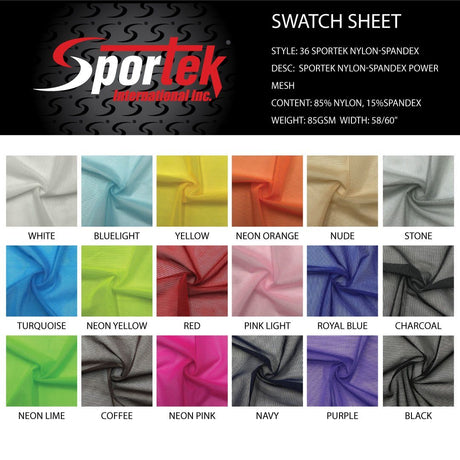
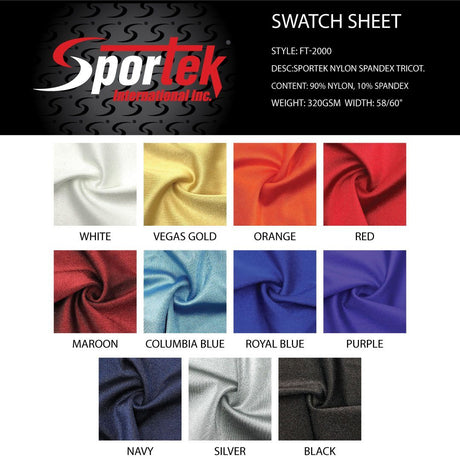
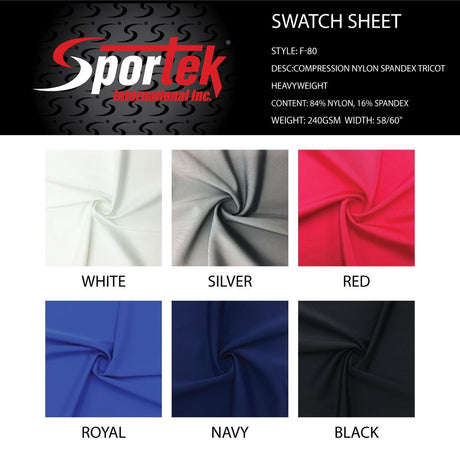
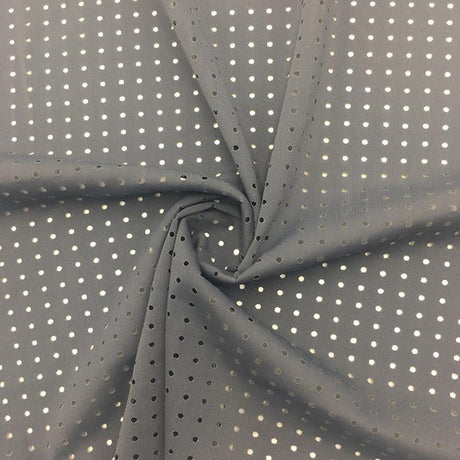
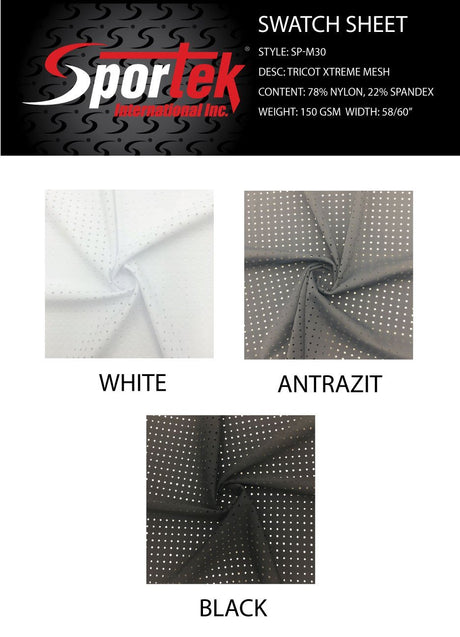
- Power Mesh and Power Net: Power mesh is a stronger, slightly heavier mesh lining (typically 4-way stretch, ~130–150 GSM) used when you need extra support or control. It’s a stretchy mesh fabric (often nylon/spandex) with small holes, providing moderate compression. For instance, Sportek’s “Xtreme Mesh” lining (78% Nylon, 22% Spandex, 150 GSM) offered by SpandexByYard combines high stretch with strength, making it ideal for swimwear panels that require support. Power mesh is great for high-waisted bikini bottoms, tummy control panels, or plus-size swimwear, where a regular lining might not provide enough hold. Power net is a similar fabric but even more robust – with a higher spandex content and weight (often 170–200 GSM) for firm compression. Power net is used for shelf bras, bust support, or shaping inner layers (think of it as the “muscle” of linings). If your swimsuit design includes a built-in bra or a panel to hold in the abdomen, power mesh or power net is the go-to lining. Keep in mind that these fabrics are more rigid; they hug the body and maintain shape over time. SpandexByYard carries power mesh in varying weights – for example, a Soft Power Mesh (85% Nylon, 15% Spandex, ~100 GSM) for gentle support, and a PowerNet Mesh (170 GSM) for high compression needs. Use power mesh/power net strategically: often in front panels, tummy control linings, or bust liners, while possibly using a lighter lining elsewhere.
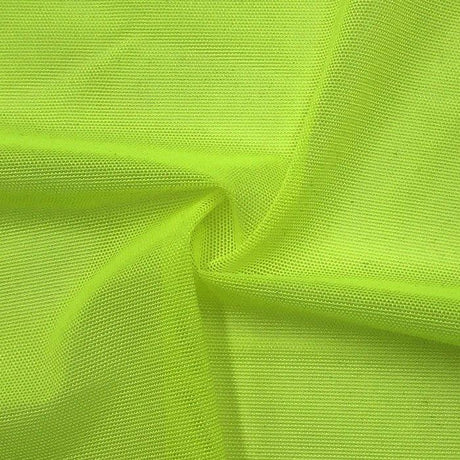
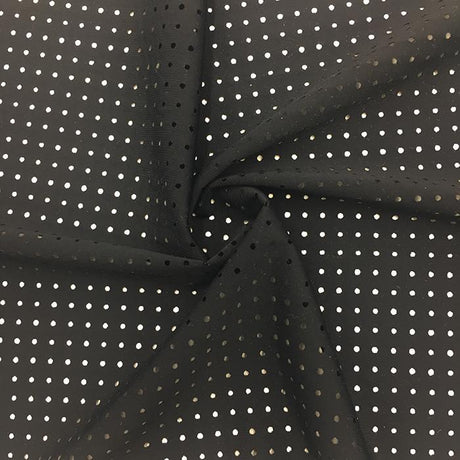
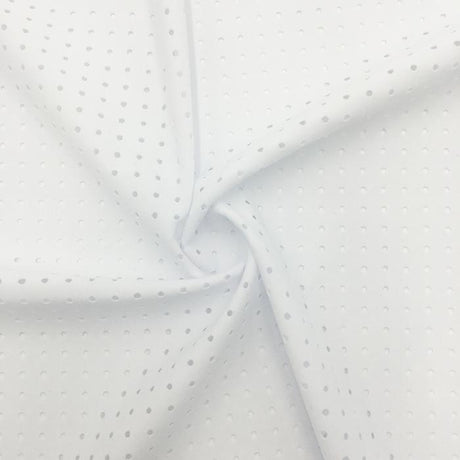
- Lightweight Stretch Mesh: This category includes very light, breathable mesh linings (often ~80–100 GSM) that offer coverage with minimal weight. These meshes have greater openness for airflow and are ideal when you need just a bit of lining for modesty but want to avoid bulk. For example, a micro poly mesh (around 82 GSM) can be used to line areas like the crotch of swim bottoms or the front of a swimsuit made from a thicker fabric, providing a layer of separation without significantly altering stretch or drying time. Lightweight stretch mesh is popular in performance swimwear or competition suits where swimmers want suits as light as possible. It’s also used in some men’s swimwear (like boardshorts) as a mesh brief lining, though those are usually not as stretchy. Choose a light stretch mesh when your outer fabric is already stable/opaque or when you’re lining only a small section (like a front panel of a lace or crochet swimsuit that just needs backing for modesty). Keep in mind that light mesh is less supportive; it’s primarily for breathability and quick-drying comfort, not for shaping. SpandexByYard’s collection includes a Sportek micro mesh that is 100% polyester and highly breathable – great for keeping you cool and providing just a touch of structure in swimwear linings.
Each of these linings has a purpose. Match your lining to your project’s needs: use the versatile tricot for most suits, power mesh/power net for extra support, and lightweight mesh for minimal coverage or added breathability. Always ensure whichever lining you choose has similar stretch characteristics to your main fabric (ideally 4-way stretch) so the swimsuit pieces will move together smoothly.
Choosing the Right Lining for Your Design
Every swimsuit design is unique, and lining choices should complement the style and fabric of your project. Here are key considerations for choosing the right lining approach for your swimsuit:
- Full Lining vs. Partial Lining: Decide whether your entire swimsuit needs lining or only certain parts. A full lining means cutting lining for every section of the suit (front, back, and crotch for a one-piece or both front and back of a bikini bottom, for example). Full lining is common in high-quality swimwear because it gives a uniform feel and extra support all over. It’s especially recommended if your main fabric is light-colored or somewhat sheer – a full lining will ensure nothing shows through when the suit is stretched or wet. Partial lining means only lining specific areas: for instance, many bikini bottoms are only lined in the front and crotch (leaving the back unlined if the fabric is opaque and dark). Front-only lining can suffice for modesty if the back of the fabric doesn’t go sheer. Crotch lining (a small lining panel at the gusset) is the bare minimum in many patterns to provide hygiene, comfort, and opacity in that area. Choose partial lining if your outer fabric is thick or printed (providing its own coverage) and if you want to preserve maximum stretch in some areas – unlined sections will feel stretchier. Keep in mind that adding lining slightly reduces the stretch of that piece (two layers have less stretch than one), so sometimes swimwear designers leave the back unlined for a bit more ease or cooling. On the other hand, fully lined suits tend to hold up better over time since the outer fabric is less exposed to chlorine and oils (the lining takes some of that wear) and seams are often reinforced by the two layers.
- Front-Only vs. Back Lining: If you opt for partial lining, consider the needs of the front versus the back of the suit. The front of a swimsuit (especially for women’s swimsuits) usually benefits most from lining for modesty (it covers the bust and pelvic area). The back side can sometimes go without lining if the fabric is opaque, since there’s typically less risk of show-through on the seat area with darker fabrics. However, if the swimsuit is a light color (white, pastels) or a thin fabric, line both front and back to avoid any transparency issues. Some sewists also prefer lining the back for aesthetic consistency and a firmer fit (a lined back will not stretch out as quickly). For example, competition swimsuits or dance leotards are often fully lined to ensure they stay opaque under bright lights and constant motion. If your design has cutouts or sheer sections, you might line only the solid fabric parts and leave mesh sections unlined (or use mesh as the lining for an illusion effect). Ultimately, decide based on opacity and support: line wherever the suit needs coverage or strength, and you can omit lining in places where the outer fabric alone is sufficient.
- Support and Body Type Considerations: Think about who will wear the swimsuit and how much support they need. For a small bust or children’s swimsuit, a single layer of tricot lining might be plenty of support. For a larger bust, you might want to add a shelf bra or cups (which means an extra lining piece, often of power mesh or a strong lining, that acts as an internal bra). Similarly, for someone wanting tummy control, you could use a power mesh panel in the front lining. It’s absolutely fine (and common) to mix lining fabrics in one suit – for instance, use normal nylon tricot lining throughout the suit but insert a power net panel just in the stomach area or bust area for extra hold. Heavier lining or double lining is also advisable for light-colored suits or very thin outer fabrics; you can even double up the lining layer itself for more opacity. On the flip side, if you’re making a suit for performance (like a swimmer or surfer who values range of motion), you might choose a lighter or stretchier lining to not impede movement. Always consider the stretch and recovery: your lining should stretch as much as your main fabric and spring back into shape, so the swimsuit doesn’t bag out. If your main fabric is extremely stretchy or thin, sometimes self-lining with the main fabric is an option (using the same fabric as lining) – this can work well for reversible designs or when you want identical outer and inner appearance. Just be cautious with self-lining in thick or highly elastic fabrics; doubling a very compressive fabric can make the suit too tight or cause rippling. In summary, tailor your lining strategy to the design: more lining coverage and stronger linings for support and modesty, lighter or strategically placed linings for flexibility and style.
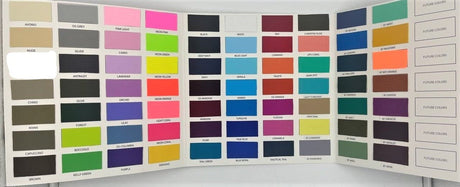
- When to Use Each Lining Fabric: To recap fabric choices with design in mind – use the standard swimwear lining (tricot) for most applications: it’s the all-purpose solution for lining entire swimsuits or bikini bottoms. Use power mesh/power net for structured support: e.g. a longline bikini top might have a power net inner layer to act as a bra, or a one-piece might have a power mesh front to shape the midsection. Use lightweight stretch mesh for secondary lining needs: e.g. under a ruched outer fabric where you don’t want bulk, or as a second layer in addition to a regular lining in only a small zone (some designers put a thin mesh behind the lining at the very front for extra modesty without a thick feel). And don’t forget to pick a lining color that makes sense: nude or skin-toned linings are popular because they don’t show through even if the outer fabric is slightly translucent. White lining behind a white swimsuit can look pristine, but note that two layers of white can still become see-through when wet – often nude is a safer bet for white suits. Black lining behind a dark outer fabric will generally make colors appear a tad darker/opaque, which is usually fine. If your suit is a bright color and might peek open, you can use a matching color lining for a professional touch (SpandexByYard carries swim linings in several colors to help with that).
In all cases, ensure your lining fabric is swimwear-appropriate (chlorine-safe, stretches, and won’t bleed dye). Using a random non-swim lining (like a cotton or non-stretch poly) is a common mistake – it can absorb water, restrict stretch, or degrade quickly. Stick with the swim-specific linings for the best results.
Prepping the Lining and Main Fabric
Before you start sewing, take time to properly prepare both your lining and main fabric. Swimwear fabrics are usually knits with a high spandex content, so a little prep goes a long way to make sewing easier:
- Pre-Wash (or Pre-Rinse) Your Fabrics: It’s often recommended to pre-wash swimwear fabric and lining, especially if they are vibrant colors. This ensures any excess dye is rinsed out and preshrinks the fabric (though synthetics like polyester/nylon don’t shrink much, they can have finishes that you’ll wash off). A quick soak in cool water can also reveal if a color bleeds. You don’t want a red outer fabric staining a light-colored lining on the first swim! So test them: soak each in cool water (you can add a drop of mild detergent). If the water shows dye, you may want to wash until it runs clear. Pre-washing also removes factory chemicals and improves the fabric’s ability to stretch and recover. Important: use cold water and gentle detergent; avoid fabric softeners (they can coat the fabric and reduce elasticity). Do not put swim fabrics in a hot dryer – just hang or lay flat to dry after pre-washing, to avoid heat damage to the spandex.
- Identify the Stretch Direction and Grain: Swim fabrics have grain (direction of greatest stretch) which is usually crosswise (widthwise) for 4-way stretch fabrics. For both your main fabric and lining, find which direction stretches the most. Typically, you’ll want that greatest stretch going horizontally around the body (circumference) to accommodate body movement, unless your pattern specifies otherwise. Align the grainline markings on your pattern with the direction of greatest stretch for both the outer and lining pieces. This way, lining and main will stretch in unison. If you cut one piece off-grain or perpendicular to the other, you could end up with the lining sagging or pulling against the outer layer. Also, make sure the lining and main fabric have similar stretch percentage – for example, both stretch 50% or both 75%. If one is significantly less stretchy, you might need to cut it slightly larger or choose a different lining so the fit isn’t compromised. Tip: Before cutting, lay your lining and main fabric together and stretch them – see if one stretches further. If your lining is a bit less stretchy, cut it using the same pattern but be careful not to accidentally tension it when sewing, or consider going up a size for the lining pieces.
- Cutting Techniques for Stretch Materials: Cutting swimwear fabric (and lining) can be tricky because it’s slinky and can shift. To get accurately cut lining pieces:
- Use a rotary cutter with a sharp blade and a cutting mat if possible – this lets you cut without lifting the fabric, reducing distortion.
- If using scissors, try cutting in a single layer (do not fold the fabric) to ensure precision. Many swimwear sewists cut all pieces in a single layer to better control placement and grain, especially for prints. You can cut your lining the same way.
- Layering trick: Sometimes you can lay the lining fabric underneath the main fabric and cut both at once, so they are exactly the same. This works if both fabrics behave similarly and you pin them well together. But be cautious – if one layer slips, you could end up with uneven pieces. It might be safer to cut your main fabric first, then use those pieces as a template to cut the lining (as one would do with underlining fabric). In fact, one method is to cut the outer fabric pieces, then lay each on the lining and cut around it – this can be faster than pinning paper to the slippery lining.
- Marking: Use tailor’s chalk or a washable marker to mark important points (notches, etc.) on the lining. Pencil can snag some knits and permanent marker can bleed, so test your marking tool on a scrap. Some linings are light-colored, so a fine pen that doesn’t bleed might be an option on the wrong side.
- No tension while cutting: Don’t stretch the fabric as you cut, or your pieces will turn out smaller once they relax. It helps to cut on a flat surface and even to place tissue paper underneath to stabilize the knit while cutting (you can cut through the paper and fabric together).
- Cut lining slightly smaller? – This is optional and advanced: if you want your lining to fit snugly and not wrinkle, some sewists cut the lining pieces about 1/8″ to 1/4″ smaller around the edges than the main fabric. This way the lining hugs the inside and doesn’t bag. If you try this, remember to still match up edges when sewing (you may have to gently stretch the lining to fit). This technique is helpful if your lining is very lightweight and tends to sag, or if you’re using a heavy outer fabric that you don’t want cinched in by the lining. For most cases, though, cutting the exact same size is fine, as long as both layers have equal stretch.
- Organize pieces & note the sides: Once cut, keep track of which pieces are lining vs main (especially if they look similar!). For example, a front lining and front main in the same color could be confused – mark the lining with a small sticker or chalk “L”. Also note which side is the right side of your lining if it matters. Some linings (like a printed power mesh or a textured tricot) might have a right side. Many swim linings look identical on both sides; in that case, it’s not critical, but try to be consistent to maintain stretch direction uniformly.
- Use Quality Elastic and Notions: Preparation also includes gathering the right elastic and thread. Always use swimwear elastic (usually rubber or a chlorine-resistant elastic) for sewing in the edges. Regular polyester elastic will degrade quickly in chlorine and saltwater. Also have stretch needles (ballpoint or stretch 75/11 size) ready for your machine to prevent skipped stitches in the spandex. Wind some bobbins with polyester thread or consider using woolly nylon in the bobbin if you know that trick (woolly nylon adds stretch to zigzag stitches, but it’s optional). Having everything prepped means once you start sewing the lining in, you won’t have to pause.
With fabric and lining prepped and cut, you’re ready for the construction. Taking the time to align stretch and cut accurately will make the sewing process much smoother and ensure your lining does its job well.
Step-by-Step Construction (How to Line a Swimsuit)
Now let’s walk through how to sew in the lining step by step. These general steps apply to a simple scenario of lining a swimsuit (for example, lining a one-piece or a bikini bottom). Your specific pattern may have slight variations, but the principles will be similar. We’ll cover two approaches: one where you treat lining and main fabric as one layer (basting them together), and another “sandwich” method for a clean finish.
1. Align Lining with Main Fabric Pieces: Start by laying out each main fabric piece with its corresponding lining piece. Make sure the stretch direction matches on both layers (the lining shouldn’t be placed crosswise relative to the main). Pin the lining to the backside of the main fabric, wrong side of main to wrong side of lining (so the lining’s right side will be against your body inside the suit). Smooth out any wrinkles and ensure the pieces are exactly aligned at the edges. If you cut notches or marks, make sure those match up through both layers. At this point, you essentially have each swimsuit piece “backed” with a lining piece.
2. Baste or Serge the Layers Together: To make sewing easier, you can baste the lining to the main fabric around the edges. Use a long zig-zag stitch or a long straight stitch within the seam allowance (e.g., 1/4″ from the edge) just to hold the two layers together. This turns the two layers into one combined piece for assembly. Alternatively, if you’re comfortable with a serger, you can even serge the lining and main together along the edges (knife just skimming off a tiny bit) – this finishes the edge and secures layers at once. However, serging at this stage is optional; a simple baste is enough since the edges will be sewn again when you assemble the suit. Basting the layers prevents shifting and puckering when you sew seams or apply elastic later. It’s especially helpful for slippery fabrics or if your lining tends to crawl away. If your pattern has a separate crotch lining piece, you would baste that onto the wrong side of the front or back as instructed (for example, many bikini bottoms have you baste the crotch lining to the front piece along the leg openings before assembling). After basting, treat the main+lining as one layer for the remaining construction steps. (Note: Some advanced sewists skip basting and just pin well, but basting is a good insurance policy for a neat outcome.)
3. “Sandwich Method” for Clean Seams (Optional): Instead of basting layers together from the start, another technique is the sandwich (or burrito) method to hide certain seams between lining and main fabric. This method is commonly used at crotch seams or shoulder seams to enclose the seam allowance. Here’s how it works in a swimsuit bottom: you would sew the front and back crotch seam twice – once for the main fabric (front to back right sides together) and once for the lining (front lining to back lining right sides together). Then, sandwich the main fabric seam inside the lining seam by flipping one through the other (often called the “burrito roll” in sewing tutorials). After this, that seam allowance is hidden between the layers, and the lining and main are attached at that seam. Katie Kortman describes this approach for fully lining bottoms: she sewed the outer front to back at the crotch, and same for the lining, then placed the lining inside with wrong sides together to proceed. You can do similar at side seams or bra cup seams – sewing linings separately then joining. The benefit is completely hidden seams (no seam allowance against the body). The drawback is it can be a bit confusing to roll and turn things, and it might limit access for topstitching later. For many, a simpler approach is as described in step 2 (basting and treating as one). Feel free to mix methods: for example, use the sandwich technique just at the crotch for a really clean finish there (so no exposed seam in the gusset), but baste the layers elsewhere. Whichever method you choose, by the end of this step you should have the lining attached to the main fabric either by basting or enclosed seams, and you can handle each piece as a unit.
4. Assemble the Swimsuit Seams: Sew your swimsuit together as per the pattern instructions, now that each piece is lined. If you basted the lining to main, just sew as usual – e.g., sew front to back at side seams (you’ll be sewing through lining and main together, which is fine). Use either a serger or a stretch stitch (zigzag or lightning stitch) on a regular machine for these seams. If you did the sandwich method, some seams (like side seams) might involve sewing through two lining layers and two main layers at once in places – that’s okay, just go slow and use plenty of pins or clips. The key is to ensure the lining doesn’t get caught awkwardly. Tip: If your lining is slippery, sometimes it helps to sew with the lining side up under the machine, so you can watch for any shifting or tucks forming in the lining. On the other hand, if your feed dogs prefer the lining (or main) against them, do what gives the smoothest feed. After each seam, check that the lining layer lies smoothly with no wrinkles caught. If you find the lining has bubbled a bit at a seam, unpick that section and try again, perhaps stretching both layers gently and evenly as you sew. At this point, you should have a swimsuit that is basically constructed, with the lining and main joined at all seams and edges still raw.
5. Attach Elastic to Openings: The final structural step is adding elastic to the raw edges (such as leg openings, armholes, neckline, waist – wherever your pattern calls for elastic). This is where the decision comes: attach elastic through both layers (lining+main together) or to one layer only? Most commonly, you will attach elastic with the lining and main as one (especially if you’ve basted them). This means when you sew elastic to, say, a leg opening, you are stitching through the lining and main fabric at the same time, treating them as one edge. This method is straightforward and secures the layers. In some cases, though, advanced techniques attach elastic to the lining layer only first, and then fold the main fabric over, to hide the elastic. We’ll describe the standard method first:
- Elastic through Both Layers (Standard Method): Pin or clip your swimwear elastic around the opening (e.g., leg hole) on the wrong side of the lining. Usually, you align one edge of the elastic with the raw edge of the fabric. Divide both the elastic and the opening into quarters and match the quarter points – this ensures you distribute any stretch evenly. Start sewing the elastic to the edge using a zigzag stitch (or serger). Use a stitch width about as wide as the elastic, and stitch length that gives a secure but not too tight finish (a medium zigzag works well). Stretch the elastic gently between pins to fit the fabric, but be careful not to stretch the fabric itself – just the elastic. Sew all the way around. You’ll now have the elastic stitched onto the lining side of the edge. Next, flip or turn the elastic to the inside (toward the lining side) so that it’s now encased and the edge looks finished. Topstitch on the right side of the fabric (the outside of the swimsuit) with a zigzag or twin needle, catching the elastic on the inside. This is often called the “turned and topstitched” elastic application. It results in a clean look on the outside and a plush elastic edge on the inside. The lining and main are caught in that final topstitching, securing everything.
- Elastic to Lining Only (Clean Finish Method): This technique is used in some cases to completely hide the elastic and the seam. For example, at a neckline or waist, you might sew the lining and main right sides together along the edge with the elastic in the seam, then flip it. One approach: with lining and main right sides together, align the elastic along the edge on top of the lining. Sew a zigzag or serger seam that attaches all three layers at once (main, lining, elastic). Then flip the lining to the inside, which will roll the elastic to the inside as well, leaving a clean edge with no visible stitching on the outside. You can understitch the seam allowance to the lining to keep it from rolling (understitching means sewing the lining and seam allowance together, close to the seam line, on the lining side). This method was used by Closet Core Patterns for the waist of their Faye Swimsuit: they sewed the waist elastic through all layers, then understitched it to the lining, resulting in the elastic being hidden and the lining staying put. After flipping, you may or may not need a topstitch on the outside; understitching often is enough for smaller openings like necklines. For leg openings, this method can be tricky because you’d have to construct the suit in a way to turn it right side out after doing that – more common in a fully bagged lining one-piece or a reversible swimsuit. It’s an advanced finish that yields no visible stitching on the outside. If you’re adventurous, give it a try on a simple edge like a neck binding to see how it works.

Example: A swimsuit bottom (inside view) fully lined with black tricot. The white elastic has been sewn to the waist opening through both the lining and main fabric layers. In the next step, the elastic will be turned to the inside and topstitched, creating a secure, stretchy waist finish.
In summary, for most home sewists, attaching elastic by sewing through both layers and then turning is the reliable method. Always remember to stretch the elastic evenly and use the right amount of elastic as per your pattern (often the elastic is slightly shorter than the opening to snug it up). Once the elastic is sewn and turned, your swimsuit edges are finished and the lining is neatly tucked inside.
Finishing Techniques: Professional Touches
With the lining in place and elastic attached, it’s time to add those finishing touches that make your swimsuit look professionally made. These techniques ensure the lining lies smoothly and the suit is comfortable to wear:
- Topstitching and Understitching: Topstitching is often the last step after turning elastic. Using a medium-width zigzag stitch (or a twin needle stretch stitch), sew around each opening on the right side, about 1/8″ to 1/4″ from the edge. This stitching catches the seam allowance (and elastic) underneath and secures it. Topstitching does two things: it keeps the lining from rolling outward and it provides a nice flat edge finish. A zigzag is ideal because it will still stretch with the fabric (a straight stitch would break when the fabric stretches). If you prefer, you can also use a coverstitch machine for an even more professional finish. Understitching was mentioned earlier: it’s a stitch on the lining side that holds the seam allowance to the lining. For example, after sewing a neckline seam, you might understitch, which helps the lining stay inside. Understitch wherever possible (like along a shelf bra seam or a top edge) – it really prevents the lining from peeking out. In areas you can’t understitch, a line of topstitching from the outside will do the trick. The goal is that when the suit is being worn, you don’t see the lining popping out at the edges, which can happen if it’s not secured.
- Using the Lining to Clean-Finish Edges: One great thing about lining is you can use it as a facing to hide raw edges. For instance, in some bikini tops, you might sew the lining and main right sides together along the top edge, then flip the lining inside and just secure the bottom edge when attaching the band – leaving the top edge clean with no visible stitching outside. This is essentially the technique we discussed with the clean finish elastic. Another example: if you have a one-shoulder swimsuit, you could fully sew the armhole and neckline right sides together (lining to main) and then turn the whole thing through an opening, yielding a fully clean-finished edge. These methods are a bit like bagging a lining in a dress. They often require leaving one seam open to turn through (like a side seam) and then closing it last. If your pattern isn’t specifically written for that, don’t worry – you can achieve a very neat look with the standard turn-and-topstitch method too. The lining inherently hides the inner seam allowances so your garment is comfortable. Just be sure any trim or edge detail is accounted for with the lining. For example, if you’re adding a ruffle or flounce on a bikini edge, decide if it’s sewn on top of the lining or sandwiched between lining and main.
- Adding Cups or a Shelf Bra: For extra bust support, you can incorporate bra cups or a shelf bra into the lining. A shelf bra is usually an inner layer (often of power mesh or strong lining) that has an elastic sewn on the bottom (underbust) and sometimes darts or seams to accommodate the bust. You would attach this piece to the lining of the front before assembling the suit. Katie Kortman’s blog example adds a power mesh shelf-bra by cutting a piece of power mesh for the front, shorter than the outer front, and sewing elastic to its bottom edge. This mesh piece is then basted to the main front piece at the top and side edges, effectively acting as a lining just for the bust area. When the suit is fully lined, that shelf bra is sandwiched inside. If you plan to do this, choose a power mesh or strong lining that matches the stretch of your main fabric but has good rebound to hold up the bust. Sew the elastic on the bottom of the shelf bra by stretching it slightly and zigzagging – this creates a supportive underbust band (kind of like the bottom band of a sports bra). You can also insert foam bra cups. These are best added by sewing them onto the lining before the lining is attached to the main. Put the swimsuit on (or on a dress form) to determine placement, then pin the cups to the lining (on the side that will touch the outer fabric, not against the body). You can zigzag around the edges of the foam cup to secure it to the lining. Alternatively, create a cup pocket: sew a layer of mesh over the cup so it’s removable. Remember to use cups that are designed for swim (they usually have drain holes and resist flattening when wet). After cups or shelf bra are in place, proceed with assembly normally. The result will be a suit with hidden support. Note: If you add a substantial shelf bra, you might want to use a lighter lining for the rest of the suit to avoid too much bulk. It’s fine to mix linings (e.g., power mesh in bust, regular lining in torso).
- Edge Finishes with Binding: Sometimes instead of turning elastic under, swimsuits use a binding (a strip of lycra) as a finish, especially on design edges like cut-outs or strappy styles. In a lined suit, you can still do this – you’d sandwich the binding around both layers at the edge and stitch. Or for something like a neckline binding, you might not line that area and use binding as a finish while the rest is lined. This is a more specialized technique, but worth mentioning: the presence of lining doesn’t stop you from using decorative edge finishes, it just means you treat the lining and main as one when applying them.
- Trimming and Bar-tacking: Little finishing touches can make a difference. Trim away any excess lining that extends beyond the main fabric on the wrong side after you’re done – sometimes during turning or elastic application, the lining might peek a hair out; you can carefully trim it back so it’s invisible. Also, where the lining is loose (if you left some parts unsewn, like a free-floating crotch lining in some designs), you can tack it down. For example, often the back of a crotch lining is just tacked at the seam allowances so it doesn’t flip around. Use a few hand stitches or machine bartacks at discreet spots (like side seams or crotch seam) to secure the lining layer to the main so it stays in place when the suit is worn or washed. These should be small and hidden on the outside (stitch in the ditch at a seam).
By applying these finishing techniques, your swimsuit lining will not only do its job functionally, but also look clean and feel comfortable. Lining, when finished properly, should be almost unnoticeable to the wearer – except for the fact that the suit feels supportive and well-constructed!
Common Mistakes (and How to Avoid Them)
Even experienced sewists can run into issues when working with swimsuit linings. Here are some common mistakes along with tips to avoid them:
- Choosing the Wrong Lining Fabric: A frequent pitfall is using a lining that isn’t compatible with the main fabric. For example, using a lining with insufficient stretch or recovery can cause the swimsuit to fit poorly. Always match the stretch percentage and type of your lining to your outer fabric. If your main fabric is a 4-way stretch spandex, your lining must also be 4-way stretch (at least 50% stretch in both directions). Another aspect is weight: using a very heavy power mesh on a very lightweight fabric might result in the outer fabric being overwhelmed and crinkling. Conversely, a very thin lining on a light-colored, thin outer fabric will lead to see-through issues. Solution: Select a lining that closely resembles your main fabric’s stretch and thickness needs. When in doubt, a standard swim tricot lining is a safe bet for most projects, and you can add extra support only where needed.
- Ignoring Color and Opacity Issues: You’ve made a gorgeous white or pastel swimsuit, but skip using an adequate lining – the result could be a see-through disaster once the suit gets wet. A major mistake is underestimating how transparent some fabrics become in water. Light colors and thin fabrics almost always need a heavy or double lining for modesty. Another related issue is color show-through: a dark lining under a light fabric might make the fabric look dull or dirty. Solution: For light-colored suits, use a nude or skin-toned lining or double up a lighter lining. For fabrics that tend to get transparent, consider using two layers of lining (or a thicker specialty lining) in the front and back. If using power mesh for support in a light suit, choose a beige or white power mesh so it doesn’t show through. Always do an opacity test: layer your lining under the main fabric and stretch both over your hand – then get it wet under a faucet. See if you can see your skin tone or light through it. This will tell you if you need more lining.
- Not Prepping or Securing Layers (Shifting Lining): Lining that isn’t basted or properly pinned can shift during sewing, causing wrinkles, bubbles, or uneven fit. A common mistake is thinking you can just hold the lining and main together and sew – but as the machine feeds, the layers may move at different rates. This can result in the dreaded “lining peeking out” on the outside or bunching on the inside. Solution: As described in the steps, baste, baste, baste! It may seem time-consuming, but basting the lining to the main fabric prevents most issues. If you absolutely hate basting, then use a ton of pins or clips (placed perpendicular to the seam so you can sew and pull them out as you go). Also, using a walking foot on your machine can help feed both layers evenly. Another tip: slightly tension the layers by hand (gently pull both front and back of the fabric under the presser foot) to mimic how the seam will stretch on the body. This can prevent the lining from creeping or the outer layer from getting stretched without the lining.
- Incorrect Elastic Application: Sewing elastic to swimwear can be tricky – a common mistake is either over-stretching or under-stretching the elastic, leading to rippled or loose openings. Another mistake is sewing through one layer only by accident when you intended to catch both lining and main – this can cause the lining to not actually be secured and it might roll out. Solution: Mark quarter points on both elastic and openings and distribute the elastic evenly. Generally, don’t stretch the elastic too much for areas like the backside of leg openings, or it can cut into the flesh; but don’t stretch too little on front neckline edges that need to hug the body (patterns usually give guidance on how long to cut elastic – trust those ratios). When sewing, make sure you are catching both layers (if that’s the intent) – you should see your zigzag stitches on the lining side firmly holding the elastic and both fabric layers. If doing a clean finish, ensure you follow the method precisely so the elastic ends up encased. It’s easy to accidentally twist elastic or put it on the wrong side; to avoid this, always pin the elastic all around before sewing and check that everything is as it should be. Practice on a scrap sandwich of lining + main + elastic to get your machine settings right (many mistakes come from wrong tension that causes the fabric to lettuce-edge). A well-attached elastic will make the difference between a saggy opening and a secure, durable one.
- Uneven or Bumpy Finish at Edges: Sometimes after all is sewn, you might find the lining is poking out a bit or the edge isn’t laying flat. This could be due to the lining being slightly larger or not properly topstitched. Solution: If you notice the lining rolling out, you probably need to do (or redo) an understitch or topstitch closer to the edge to keep it in place. If the edge is fluting or waving, check if the elastic was stretched uniformly; minor waves often settle once the suit is on the body, but big waves mean the elastic was too tight or the fabric got stretched. To fix a mild wave, a steam press very lightly can help shrink it back (careful – don’t melt or shine your fabric; use a pressing cloth and low heat). To fix lining that shows, sometimes you can trim the lining slightly smaller along that edge (if seam allowance allows) so that it pulls to the inside. Ideally, plan these things in advance by cutting the lining a hair smaller or using slightly tighter tension on the lining when attaching to encourage it to stay in.
- Using Pins Incorrectly: In wovens, we pin perpendicular to seams; in swim knits, using regular thick pins can leave holes or snags. It’s a mistake to jab lots of pins into spandex – those holes can actually expand or run. Solution: Use fine ballpoint pins or wonder clips to hold layers. Place pins in seam allowances if possible. After sewing, check for any remaining pinholes – often a wash will close them up since spandex is forgiving, but better to avoid making them in visible areas.
- Neglecting to Adjust Fit for Lining: Lining can change the fit slightly – fully lined suits are a bit less stretchy, as noted. A mistake is not considering this, especially if you are between sizes. Solution: If your outer fabric is very stretchy and your lining is more stable, you might want to sew slightly smaller seam allowances (giving a touch more room) to compensate for reduced stretch. Or conversely, if using power mesh, realize it will pull the garment tighter, so maybe cut that piece a bit larger if you want a gentler compression. Always do a test fit if possible. You can baste the main pieces together without elastic to check the general fit; the lining being there means it will fit tighter than an unlined test, so factor that in.
By being mindful of these potential mistakes, you can catch or prevent them. Remember that unpicking stitches on swim fabric is difficult (all those tiny zigzags in stretchy material!), so slowing down and doing it right the first time saves a lot of grief. When in doubt, practice on scraps – sew a mini bikini out of scrap fabric and lining to perfect your technique. Experienced sewists know that a bit of patience during construction can make the difference between a homemade look and a polished, store-bought look.
Care and Washing Tips to Maintain Swimsuit Lining
The work doesn’t end once the swimsuit is sewn – proper care and laundering will extend the life of your swimsuit and its lining. Swimsuits endure harsh conditions (chlorine, salt, sun, sand), so here’s how to keep your lined creation in top shape:
- Rinse Immediately After Use: Chlorine and saltwater are the enemies of spandex. Chlorine is a corrosive chemical that will break down swimsuit fibers over time. To protect your lining and outer fabric, rinse the swimsuit in cool fresh water as soon as possible after each wear. Even a 30-second rinse under a tap or in a sink removes a lot of chlorine, salt, and body oils that can otherwise sit in the fabric and cause degradation. Gently squeeze (don’t wring) the water out after rinsing.
- Hand Wash Gently: The best method is to hand wash your swimsuit. Fill a sink with lukewarm or cool water and a small amount of mild detergent (or a specialty swimwear wash). Avoid bleach or harsh detergents – never use chlorine bleach on a swimsuit (it will ruin both the outer and lining by destroying the elastic fibers). If you can, use a detergent designed for delicate or stretch fabrics. Lightly agitate the swimsuit in the sudsy water, focusing on areas like the crotch lining which might need extra cleaning. After a few minutes, rinse thoroughly in cool water. If you must use a washing machine, put the swimsuit in a mesh lingerie bag and use the gentlest cycle with cold water, but hand washing is strongly preferred for longevity.
- Dry Flat in Shade: Do not put swimsuits in a dryer. High heat can ruin the elastic in the lining and outer fabric. Instead, lay the swimsuit flat to dry or hang it by the center (like drape it over a rod at the middle so the weight is distributed) – hanging by the straps when wet can stretch them out. Keep it out of direct sunlight while drying, as UV rays can fade colors and also degrade the fibers over time. The lining, especially if polyester, might handle chlorine better, but the spandex in both layers is vulnerable to UV and heat. A cool, shaded spot with good airflow is ideal for drying. It’s normal for the lining of a suit to dry a bit more slowly because it’s sandwiched inside – flip the suit inside out to let the lining side get airflow for part of the drying time.
- Avoid Rough Surfaces: Be mindful that the inside lining can snag on rough surfaces just as the outside can. When changing out of a wet suit, avoid pressing it into concrete, wood, or decks where splinters or rough spots could catch the fabric. The lightweight lining mesh in particular can snag easily (it’s like a fine net). Also beware of Velcro on beach covers or bags – that stuff will pull at swim fabric and lining fiercely.
- Rotate Swimsuits: If you swim frequently, don’t wear the same suit every day. Give it 24 hours to bounce back. Spandex fibers need a bit of time to return to shape, and the lining will last longer if it’s not constantly wet or under strain. Owning a couple of swimsuits and rotating them will significantly prolong their life.
- Storage: Make sure your suit is completely dry before storing it to prevent mildew. Don’t store a wet suit in a sealed bag for a long time (that can lead to odors or even color bleeding if left too long). Also, don’t leave a crumpled wet swimsuit wrapped in a towel all day – the combination of moisture and possibly residual chlorine can eat away at it. A quick rinse and hang, even if you can’t fully wash it immediately, is better than leaving it dirty.
By following these care tips, your swimsuit lining will remain stretchy and supportive for much longer. Chlorine, salt, and sun won’t be able to do as much damage, meaning your handmade swimsuit stays in great condition season after season. Remember, the lining is just as important as the outer fabric – if the lining loses elasticity, the suit could sag or bag out, so treat both layers kindly.
Summary: Swimsuit Lining Checklist
For a quick recap, here’s a checklist for lining a swimsuit successfully. Use this as you plan and sew your project:
- ✅ Pick the Right Lining Fabric: Choose a swimsuit lining (tricot, power mesh, etc.) that has similar 4-way stretch as your main fabric and appropriate weight for your needs (lighter for dark fabrics, heavier/double for light colors). Ensure it’s chlorine-resistant and in a color that won’t show through.
- ✅ Pre-Wash and Test: Pre-wash or at least rinse your lining and main fabric. Test stretch and opacity by layering them. Do a quick water test to check for transparency and color-fastness.
- ✅ Align Stretch & Grain: Cut lining with the same grain direction as the main fabric so they stretch the same. Lay pieces together to verify the greatest stretch goes around the body for both.
- ✅ Full vs. Partial Lining Plan: Decide if you will fully line the suit or just certain parts (front, crotch, etc.). For modesty and support, full lining is best; for saving weight or flexibility, partial can work if fabric allows. Plan any power mesh panels or extra support layers now.
- ✅ Cutting Technique: Cut accurately. Use a rotary cutter if possible. If using the main pattern pieces, cut the lining to the same shape (or slightly smaller by a few millimeters if you want a snugger lining). Keep lining pieces labeled.
- ✅ Baste Layers Together: Don’t skip this for a clean sew! Baste or serge lining to each main piece wrong sides together around edges. This prevents shifting when sewing seams and elastic.
- ✅ Smooth, Even Assembly: Sew seams with lining and main aligned. Stretch gently as you sew to avoid any lining tucks. If using the sandwich method for a clean crotch seam or similar, be sure to align pieces correctly and turn carefully so you don’t twist the lining.
- ✅ Elastic Application: Cut the correct length of swim elastic for each opening (refer to pattern or use approx 85-90% of opening length, depending on area). Quarter-mark the elastic and opening. Sew elastic on with a zigzag, stretching evenly. Then turn and topstitch for a durable, professional finish. Make sure the lining is caught in the stitching so it’s secured.
- ✅ Topstitch/Understitch Edges: Topstitch around edges (leg holes, waist, neckline) with a stretch stitch to keep the lining rolled inward and to secure elastic. Understitch on the lining side where possible (especially if you did a clean finish) to keep that lining hidden.
- ✅ Optional Support Features: If needed, add extra support: sew in bra cups to the lining, or include a power mesh shelf bra with underbust elastic for larger busts. These should be done before final assembly. Also double-check if any areas (like a plunging neckline) need an extra piece of lining or power mesh for reinforcement.
- ✅ Final Inspection: Turn the suit right side out and check all lining areas. Trim any lining that extends beyond the main fabric. Make sure no lining is sneaking out at edges. All seams should have lining edges tucked in. If anything is off, you can still fix small issues now (it’s easier before the suit gets wet and in use).
- ✅ Care for Longevity: Rinse the swimsuit after each use to protect the lining and fabric. Hand wash with mild soap, and air dry flat. Avoid heat and chlorine exposure as much as possible to keep that lining elastic and strong.
By following this guide and the checklist, you’ll line your swimsuit like a pro. A well-chosen and properly sewn swimsuit lining will provide comfort, support, and confidence every time you wear your handmade swimwear. Happy sewing and enjoy your swimwear projects – with the perfect lining, they’re sure to make a splash!